Tools required:
- IntelliJ IDEA,
- JDK,
- RestAssured,
- TestNG,
- Mockoon.
Introduction:
There are many types of queries that applications communicate with each other. The most important, however, are 4 so-called CRUD queries (create, read, update, delete).
The following types of requests suit them:
- POST,
- GET,
- PUT,
- DELETE.
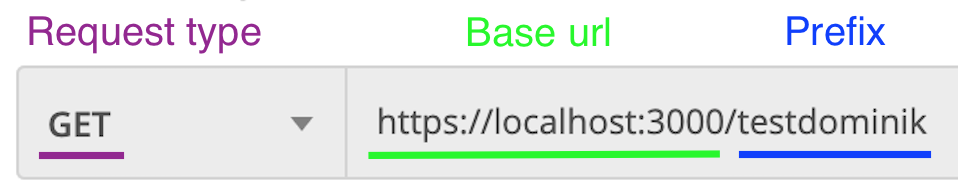
In order to construct a valid Api request of the tested application, we need to know it:
- Base URL,
- Endpoint prefix,
- Request type,
- Payload (data sent as an object - required for POST and PUT requests).
How to start writing automated API tests?
Creation of a new Type Maven project
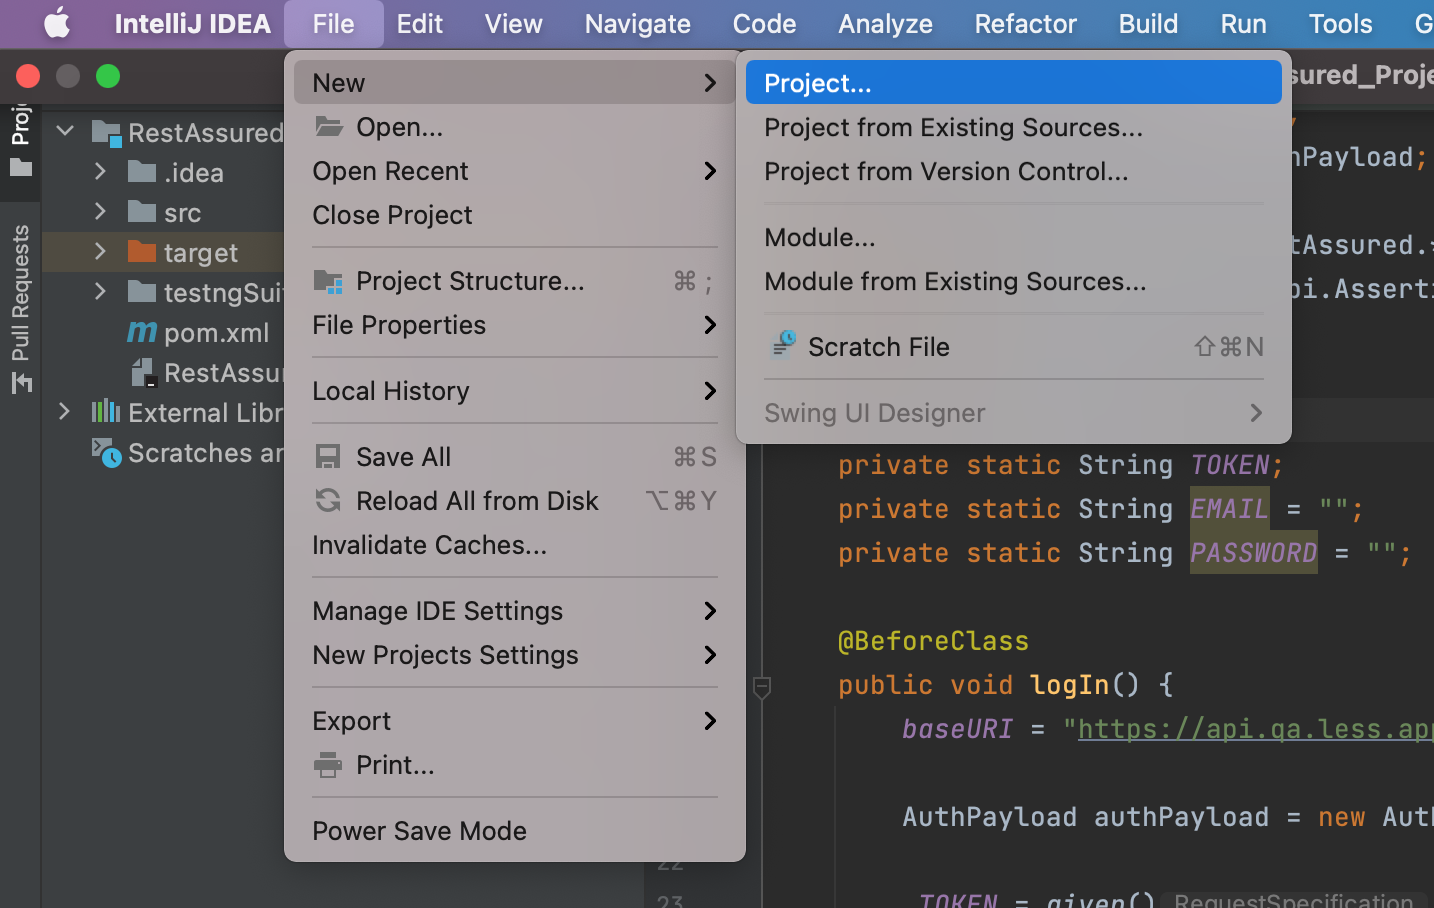
First, we need to create a new Maven project in IntelliJ IDEA.
- Choose File -> New Project:
- Choose Maven:
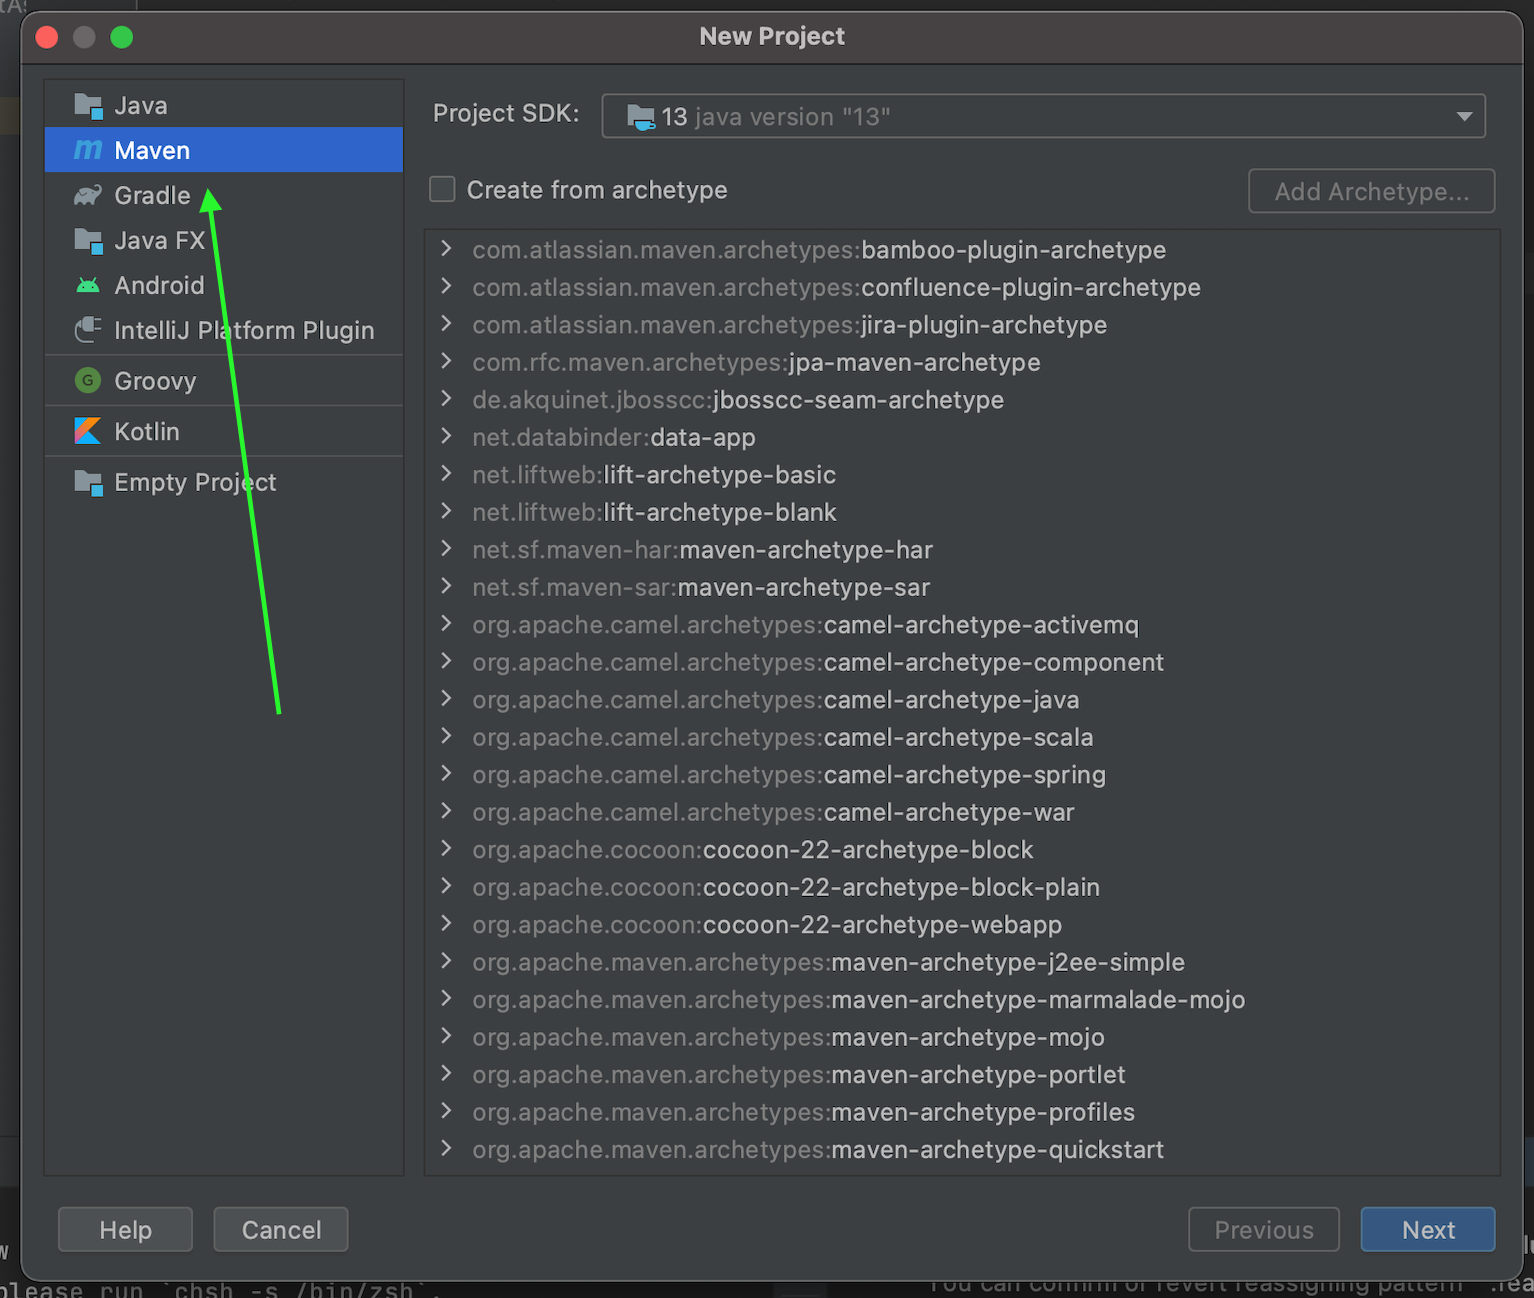
- In the next step, we name the project, e.g. RestAssured, and move on.
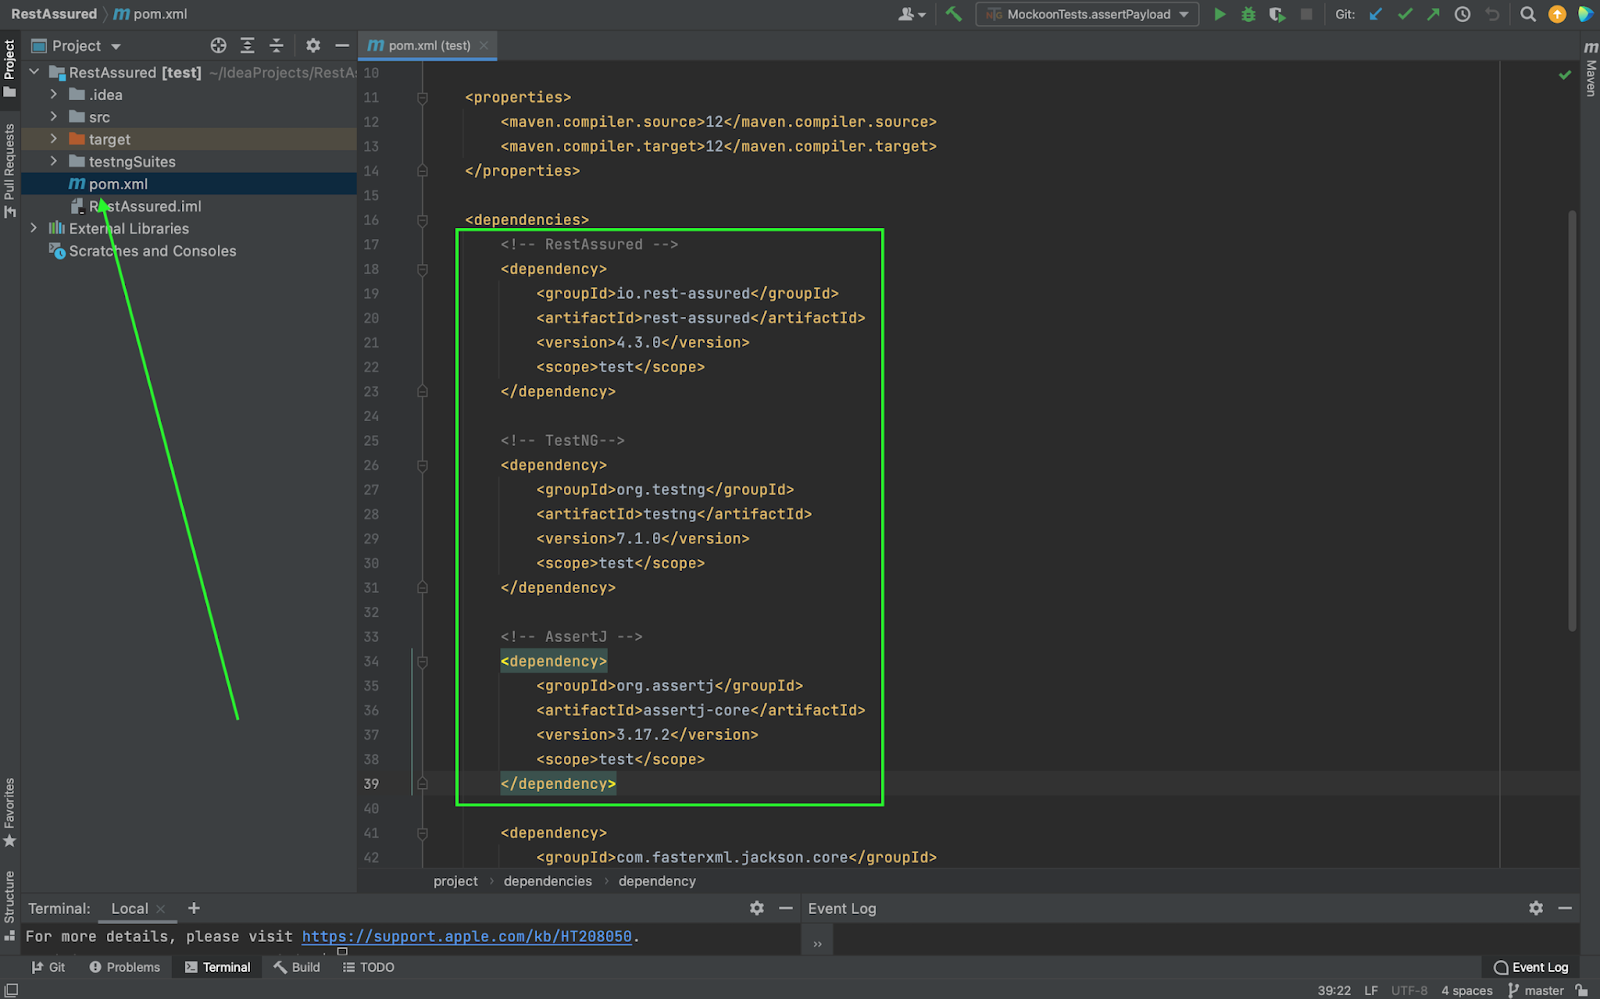
Adding dependencies to POM.xml
Adding the dependency to the pom.xml file - these are the entries which plugins are to be “installed” to our project. In our case, we need RestAssured, TestNG and AssertJ:
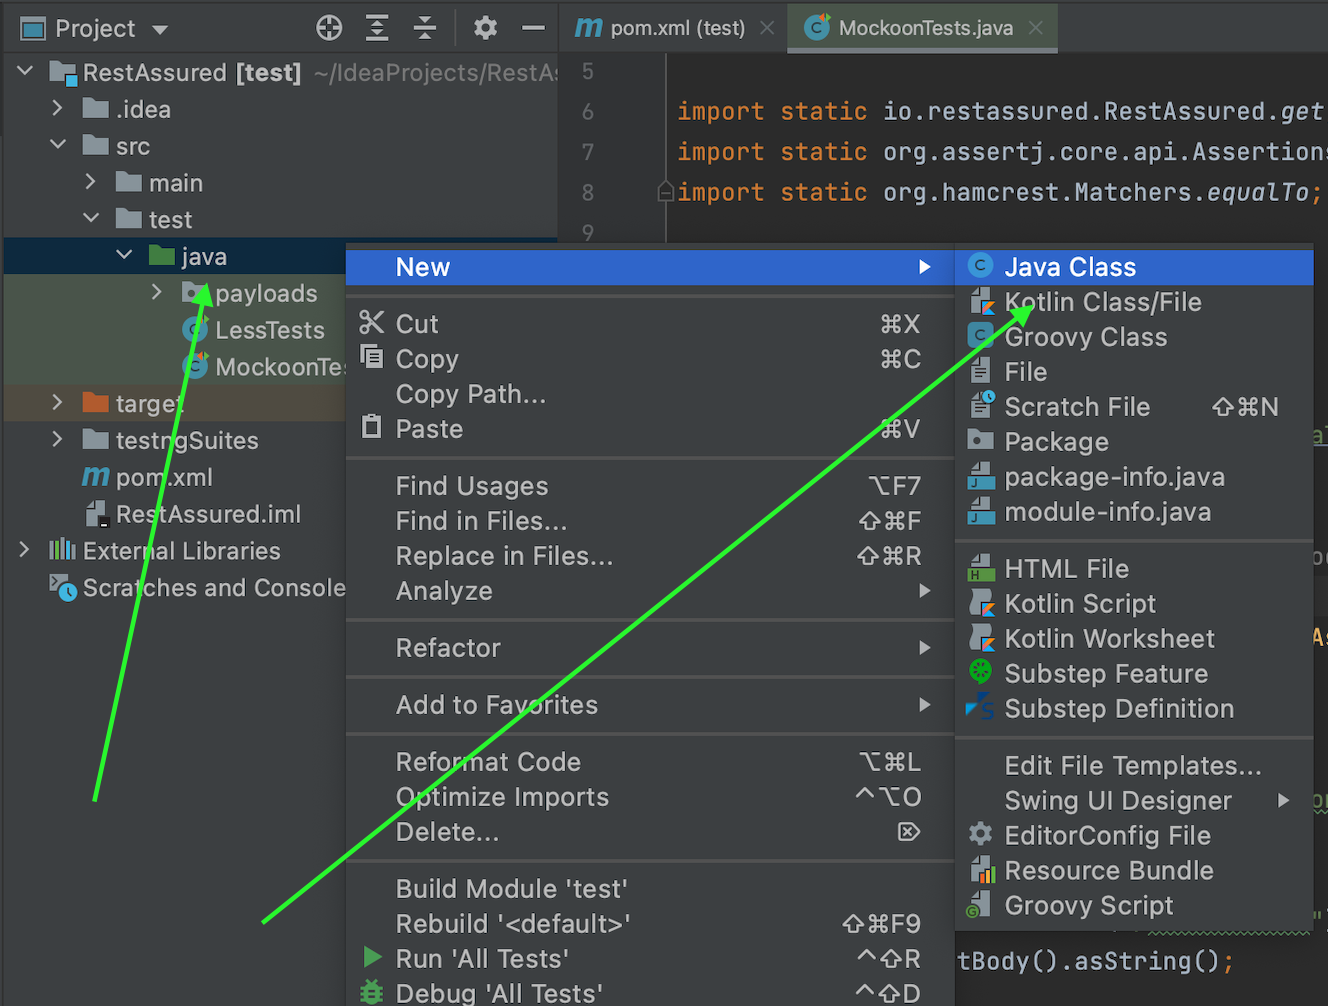
Creating a new class and writing a new test function
Adding a Java Class file named e.g. MockoonTest to the ...src/test/java directory in the project structure:
In the body of the newly added class, we create a variable of type String and assign it the value base url:

Copying the code for the first test:
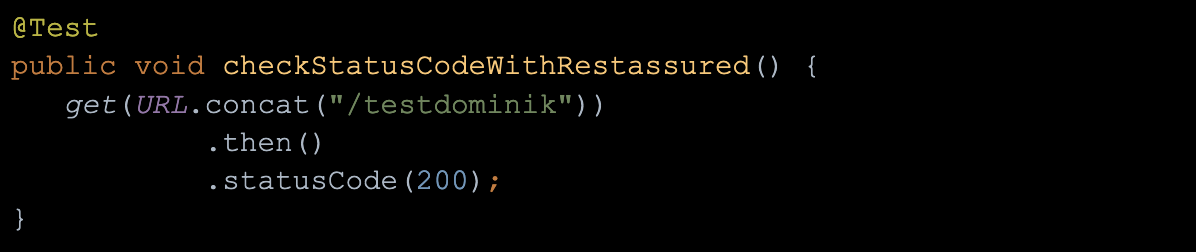
- For the @Test prefix, we import the method from the TestNG library,
- We create a new method named for example checkStatusCodeWithRestAssured (),
- In the body of the above method, we use the get function built into the RestAssured library - we also import it,
- Next, we append the prefix url to the base url to indicate the endpoint address to which we want to send the request,
- We use the next methods of the Rest Assured library, which are .then and .statusCode to check whether the server returned the 200 code we expected, depending on whether the server returned the 200 code we were expecting or not, the test will be successful or fail.
Before starting the test, run the endpoint simulation, in our case with the prefix "/ testdominik".
How to run the API simulator?
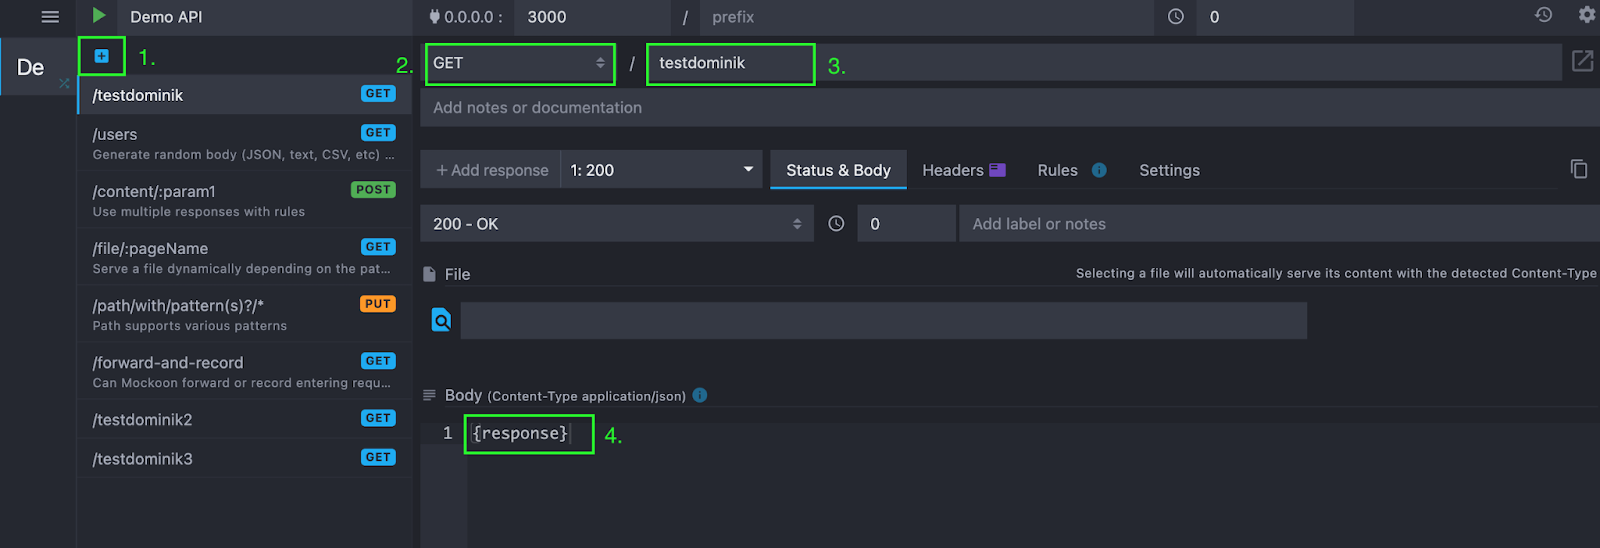
Launching and configuring the Mockoon application
Launch the previously installed Mockoon app and proceed as below:
- Click the "plus" button,
- Set the query type to "GET",
- Set the endpoint prefix to "/ testdominik",
- Optionally, in the "Body" field, set the data to be returned by the server, e.g. {response},
- Launch the simulator by clicking the green triangle play.
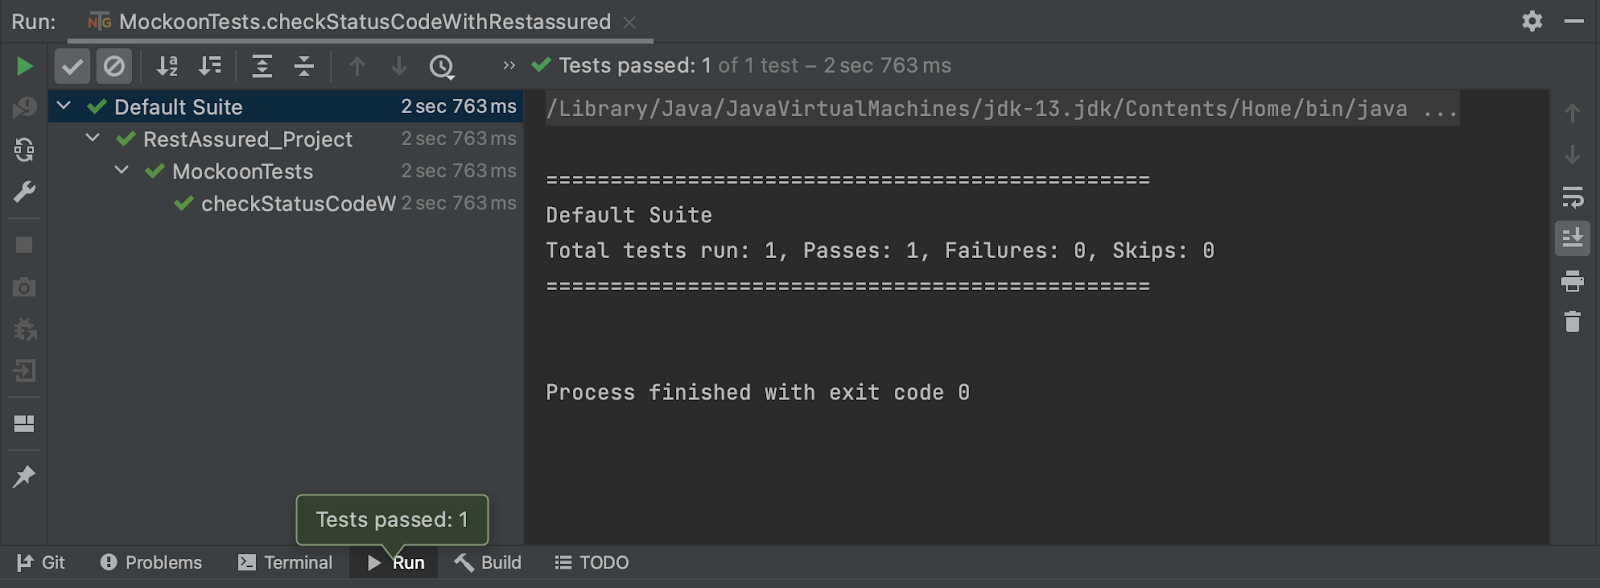
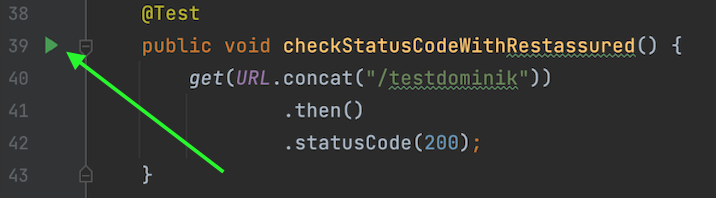
How to run our first API test?
Click the green play triangle to the left of the test function and select "Run":
Successful test result: